
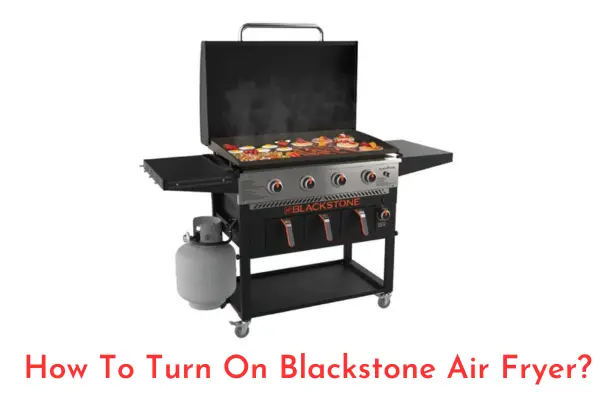
Congratulations on buying a Blackstone air fryer! And most probably, it is the Blackstone Griddle air fryer combo. It is the most popular and sophisticated combo I have ever seen. Indeed, you have a versatile oven that grills, sears, sauté, roasts, and delivers delicious foods with fewer calories. The modern appliance cooks using advanced rapid air technology that pumps hot air over your food to make it tender on the interior and crispy on the surface.
You must familiarize yourself with its operations. That will give you the best out of your new gadget. Among the steps you will master is how to turn on Blackstone air fryer. The process involves plugging your air fryer and pressing the power button. But there are several prompts to the successful operation of your Blackstone air fryer. Keep learning.
Step 1: Familiarize Yourself With The Blackstone Air Fryer
If your gadget is a standalone Blackstone air fryer, you might find it straightforward to operate. The short process will include plugging your air fryer into a suitable power outlet. Once you set your desired temperature and time, you will press the start button and you’re your air fryer will begin working. In short, the different parts of such an air fryer aren’t complicated.
But there is the griddle air fryer combo requires extra effort to master the processes. Don’t freak as isn’t hard math to crack. You can watch many videos to master the various functionalities of a Blackstone griddle air fryer combo.
The control panel is a popular component in any air fryer, whether standalone or combo. The feature comes with great ergonomics that help you turn on and operate the oven. Though there are other features like the basket and the tray, these are more straightforward than mastering the control panel.
The basket requires you to place your food in it while minding the levels. Place it in the tray or drawer and close the door appropriately to activate the cooking process. If you do things right, the oven is automatic and will begin cooking your food.
Let’s get back to the control panel. The primary unit houses different controls, including the power button, presets, preheat, fan, and programs. If you aren’t familiar with the control panel, all the processes will be an uphill task. The significant parts of this crucial panel include;
- Power button
- Fan switch
- Menu button
- Temperature/Timer control knob
- Start/stop button
- Preheat button
- Mode selection switch
- Preset cooking functions
- Display screen
- Fan speed control button/knob
- Delay start button
- Keep warm button
- Cancel/reset button
- Griddle option
The above button’s inclusion and location depend on the Blackstone air fryer model. For instance, combo appliances like toaster ovens and ovens/griddles come with compound features. The bottom line is to identify the type of Blackstone appliance in your kitchen and master its programs, features, and operations.
Step 2: Get Your Ingredients Ready
You will not turn on your Blackstone air fryer without the basket ready. Prior preparation saves you time and energy. Also, some air fryers won’t turn on without food in the cooking chamber! So, mark the second step. If your Blackstone air fryer is a combo appliance, take note of the air fryer functionality and follow the user manual directions.
Preparing the ingredients in advance is crucial and involves arranging your food in the air fryer basket. Some models of this air fryer have up to 2-quart air frying capacity that combines with 524 Square inches of cooking space. Depending on your model, the air fryer might have a cooking area to make meals for many guests. But take care of these three crucial things;
- The minimum and maximum levels of the air fryer basket: Do not go below or above the recommendations. For safety reasons, your air fryer will not start.
- Spray a little oil or cook without oil.
- Close the door appropriately.
Step 3: Plug The power cord
Your Blackstone air fryer has a power cord connecting the appliance to the power source or the electrical outlet. You can locate the line at the back of the gadget.
So, this step involves inserting the cord end (plug) into the outlet. Hold the power cord about a meter long and insert it into the outlet. It should remain secure on the wall to prevent power leakage. After plugging the cable, switch on the socket.
Step 4: Locate The Power Button
Blackstone air fryers have a power button for easy operation. The power mark is a circle symbol with a line inside, sometimes red. In short, the symbol is the famous power symbol in most electrical appliances. It is on your TV, microwave, remote control, and others.
Press this button to turn on your Blackstone air fryer. You can hold the press for a few seconds until the indicator lights show on the control panel. There will be an illumination once you successfully power on the appliance. Don’t go away; this step isn’t complete without the rest of the processes!
Step 5: Temperature/Time Selection
When the Blackstone air fryer is on and the display is illuminating to signify power, you cannot leave your food to cook without selecting the time and temperature. These two are not universal and depend on the food you are cooking.
Some recipes require longer cooking times and temperatures, while others will cook in a few minutes. So, use the Temp/Time control buttons to set the temperature from the default one on the display. Once you select these two, your gadget will start preheating. Again, this depends on the model.
Older models require you to press a preheating button, while the modern ones have an automatic process to preheat your oven. Refer to your Blackstone user manual as preheating temperatures are essential and ensure your food cooks well and is crusty and delicious.
The last step above gives your air fryer the OK to continue cooking until the food gets ready. The reason is it is an automatic process. But you can stop midway to flip your food and monitor its progress.
Related articles