
When you place your food in your GE microwave and press start, it should begin heating and cooking your food. The heating process should match up with the timer, meaning when the time is up, your food is ready for munching. But that’s not the case, as food is cold at 0.00. Your GE microwave not heating food but runs is a sign of breakdown.
Your machine could be experiencing a faulty timer, burnt-out diode, or magnetron. Also, it could be a blown fuse, a faulty transformer, or a blown Thermo protector. Sometimes, the machine has a faulty door switch or electrical faults.
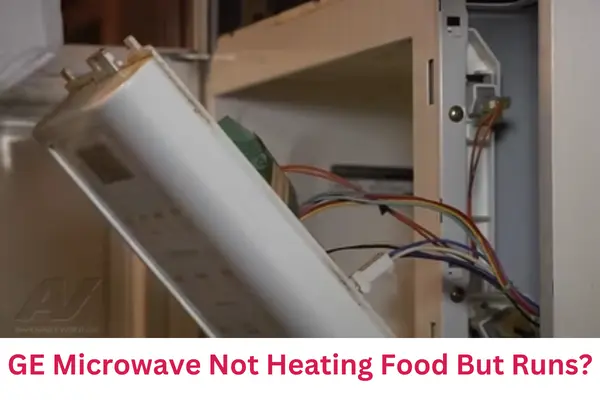
As you can see, all the above faults are technical. But it would help if you still found the causes and the ways to fix this complex issue. First things first: switch off your appliance! Next, find out why your GE microwave oven is not heating yet it is running;
1. Faulty Timer
A faulty timer will not guide your machine through the heating process. You pressed the minutes right, but there was no communication between the timer and the heating components (magnetron, diode, and capacitor). The timer may even show a countdown, but that’s false. You need to determine the problem. How? Find below;
Fix
First, your timer requires a diagnosis to reveal whether it is faulty. While your GE appliance is still on, press the other buttons, such as Cancel, Defrost, and start/stop, to determine if they work. You can also monitor the display and the touch screen. If the buttons are stiff, then the control panel has an issue. Your electrician will open the machine and check all the button terminals, including the timer. A replacement is possible.
2. Bug
Bugs leave machines operating abnormally. The microwave may show all the good signs of a functional device but fail to heat your food. Such a hitch happens on smart appliances due to system updates. Bugs are not a threat to your smart oven as they usually clear up quickly, leaving you shaking your head at what could have happened. Find the fix below.
Fix
Reset your appliance! How to do it? Press the “Off/Clear’ button on the control panel. It clears all the settings you had started on the display. Once you get out of the program, you can switch off the appliance. Start over again to see if the GE appliance heats your food.
3. Burnt-Out Diode
Your GE microwave gets AC from the main supply. The flow isn’t enough to heat your food. The diode has to transform it to DC and feed the magnetron, emitting electromagnetic heat. It is these waves that cook your food. The gadget could be running or even turning, but no electromagnetic heat emission exists. And the reason is the diode is faulty and can’t transform the AC power to DC power.
Fix
The diode requires a continuity test with an ammeter. Your tech will also test the magnetron and the transformer to rule out the breakdown. If any of these breaks, you have to do a replacement. Multiple component breakdown is expensive. So, buying a new unit is more reasonable.
Here’s a simple way to test your diode functionality;
- As usual, unplug your microwave.
- Remove the frame to access the diode.
- Create a short circuit by discharging the oven’s high-voltage capacitor. An insulated screwdriver does a safe and better job. Use the screwdriver to touch the tip of the capacitor and drag it away until you hear a pop. The pop is an indicator that the unit has discharged.
- Test your diode’s continuity with a multimeter. The meter will reveal the unit’s continuity in only one direction. If it is not showing that, there is a need for a new diode.
- You can easily get a universal microwave diode compatible with your GE appliance. Be sure to get an original fit.
4. Faulty Magnetron
When you report your malfunctioning GE microwave to a tech, one of the microwave components he will check is the magnetron. It is the core heating function in your oven, and it gets DC power from the diode. Which, in turn, receives from the transformer. The magnetron becomes malfunctions due to blowing off or old age. Such a fault does not stop the unit from running, but heating will not occur.
Fix
It is not possible to fix a faulty or broken magnetron. The only remedy is to replace the component or buy a new unit. Have a look and how to test your oven’s magnetron;
- First, you must ensure your safety, so remove the microwave from the socket.
- Unscrew the cabinet (frame) to access the magnetron.
- The next step is to discharge the capacitor. You must create a short circuit by discharging this unit as it is high-voltage and can injure you. With an insulated screwdriver, touch the tip of the capacitor and drag it away until you hear a pop. It is now safe to handle the unit.
- Test your oven’s magnetron with the multimeter. A functional magnetron has a multimeter reading of 2 to 3 ohms. These readings show resistance and continuity, so your magnetron is dead/faulty if the results are different. Look for a replacement.
5. Blown Fuse/Thermo Protector
It is possible that your GE microwave is not heating food but runs due to a burnt fuse. The fuse blows when there is a power surge or the temperature is too high for your microwave to endure. Also, the fuse may blow due to incorrect installation.
This feature is about two inches long and is usually ceramic or glass with filament. Some ovens have a large black one that is cylindrical with two prongs. Whichever type, the unit is crucial in regulating your oven’s internal temperature. The turntable may turn, but if the Thermo protector is faulty, your gadget won’t heat.
Fix
To locate your GE microwave fuse, refer to the manual. The diagram indicates the exact position for easy fuse/Thermo protector access. If your GE microwave appliance has a fuse, follow the below prompts;
- Disconnect your oven from the wall source.
- Discharge the capacitor and move on unscrew the microwave frame to access the interior panel that houses the fuse.
- Open the door and remove the screws that lock the grill.
- After unscrewing, remove the grill and slip it to the left.
- Lift the control panel to expose the thermal fuse.
- Disconnect the fuse wires and unclip the mounting screws.
- Lift the now-free thermal fuse.
- Test the fuse for continuity. A multimeter will help you to identify a faulty thermal fuse.
- Replace with a new thermal fuse by clipping in with mounting screws.
- Attach the wires to their respective terminals.
- Reassemble all the other parts of the oven.
- Restore power and test whether your GE appliance is back to normal.
What is it is a thermo-protector? The processes are similar to those of testing and replacing a thermal fuse. Check here;
- Unplug your GE microwave and discharge the capacitor. Discharging the capacitor applies in all processes that, include electrical processes. The reason is to stay safe from high voltage, which is lethal.
- Uninstall the frame.
- Unclip the air duct assembly screws to access the Thermo protector.
- Disconnect the unit and pluck it out of the retaining tabs.
- Test the unit for continuity with a multimeter. If it is dead, attach a new one. Place the new Thermo protector under the retaining tabs.
- Reconnect the wires.
- Assemble the oven and test if it works.
Note: Use GE thermal fuse or thermal protector for reliable results.
6. Faulty Transformer/Capacitor
The transformer, capacitor, diode, and magnetron are the power behind the heating functionality in your microwave. The sequence includes your machine deriving power from the socket into the transformer.
Usually, the transformer is the storage device holding high-voltage electric power (AC). This power can be useful in the magnetron, so the diode transforms it to DC. what happens if the transformer is faulty? Your device gets power but won’t flow into the diode. The microwave will run, including the turntable and timer, but heating won’t happen.
Fix
A broken transformer/capacitor smells like burning wire insulation. But you ought to be careful with the testing as the unit houses lethal energy, so you must mind your safety. Get a licensed professional to handle the replacement. Below is the process for testing a faulty capacitor;
- Get your appliance out of the electric source.
- Unscrew the frame to access your capacitor.
- Follow the discharge process for the high-voltage capacitor as you did before accessing the magnetron. (Touch the capacitor with the tip of an insulated screwdriver and drag it away) alternatively, leave your microwave disconnected overnight.
- Use an ohmmeter to test the capacitor. The capacitor usually has an infinity reading. If that’s not the case, it is faulty or dead. Replace the capacitor with a new one.
- While there, check the transformer for continuity.
- First, disconnect all the wires (six) to replace your transformer.
- Unscrew the transformer and attach the new one.
- Place the new wires on their matching ports and assemble the frame. This process is tedious, risky, and engaging. A qualified technician will do a better job.
7. Faulty Door Sensor
A faulty door sensor may not hinder the running of your device. The guide will roll, but there is no heating that will take place. Sometimes, the sensor stops the turntable. A defective door includes broken hinges, latch, or wiring. The fault affects the switches, which are three or four, depending on your GE model. If any of the switch’s break, the microwave won’t latch.
Fix
Before determining the cause of the door error, test the unit by opening and closing the door to ensure it shuts well. Remember that slamming the unit may damage the sensors and switches. A broken door is intensive to repair and often requires a replacement. Its sensors and other components are tiny and detailed, so get a tech to replace the door on your behalf.
How to test a faulty door switch? Find below;
- As a routine, before handling any electrical appliance, unplug from the power source.
- Access your microwave door switches one at a time. Most models have three.
- Test each switch with a multimeter; if there is no response, the switches need a replacement. When you order the switches, you can request a replacement service. The GE appliances company or a licensed professional will gladly help you.
8. Defective Control Board
Like any other appliance, control boards are susceptible to breakages. When that happens, the machine may behave weirdly. One of the signs is a GE microwave not heating food but runs! That’s a partial breakdown. More worrisome signs include a complete breakdown. Your tech can help replace the control board if they think it will work.
Sometimes, your appliance may never wake up, meaning that you brace yourself for a new appliance. That’s worthier than engaging in unending replacement activities. If you are not replacing the entire unit, here’s how to attach a new control board;
- Work with an unplugged microwave.
- Open your microwave door to give space for accessing the panel.
- Unscrew the grill from its place.
- Slide it to the left and pull it out.
- Detach the mounting and grounding wire screws and set them aside.
- Remove the ribbon connector.
- Take off the control board.
- Attach your new GE microwave control board: place the ribbon connector and replace the mounting screw, the grounding wire screws, and the external mounting screws.
- Slide and screw back the grill into its place.
Note: use only the GE microwave control board. Other brands will not match the oven.
9. Obsolescence
When your GE microwave oven is old and weary, most components will weaken and begin malfunctioning. The heating process will dwindle, often taking the oven longer to warm a cup of water. There is no cure for obsolete devices. Their lifespan is over, and the best you can do for yourself is to get a new microwave.
GE appliances remain top-performing gadgets and will work tirelessly for years. We can help you get a new ultramodern microwave if you don’t know the latest models. Talk to us.
Related articles
- How To Turn Off Vent Fan On GE Microwave?
- How To Clean Ge Cafe French Door Oven With Microwave?
- How To Remove GE Profile Microwave Trim Kit?
- Ge Microwave Time Display Not Working (Quick fix!)
- Does Arcing Damage A Microwave?
- Do You Microwave White Castle Burgers In Plastic?
- Best Microwave With Trim Kit
- Best 30 Inch Built-In Microwave
- Best Countertop Microwave Trim Kit
- Best Small Countertop Microwave