Cuisinart blender is the right appliance that can save you time preparing food. When in a hurry, you can create your sauces, soups, and smoothies without challenges. This type of blender comes in handheld and countertop models.
Some models of these blenders have features like juicers and ice cream makers. After acquiring a new blender, you can worry about how to assemble its blades. Relax! I will show you a step-by-step guide on how you can assemble your Cuisinart blender easily.
- Look for A Flat Surface
Finding a flat surface is essential when assembling your Cuisinart blender. Then gather all the accessories and parts of your blender. Also, you need to have a head screwdriver in place.
- Assembling the Base of Your Blender
After gathering all the materials, an attachment of the blender base is required. Screwing the two rubber feet is needed to ensure they are pointing in the right direction. This is important to make sure the blender is standing on its own. Also, it will assist the blender to remain stable.
- Washing All Accessories and Parts with Soapy, Warm Water
Wash the accessories and parts of the Cuisinart blender carefully in soapy and warm water. Rinse properly and dry them using a clean towel. Pay much attention to the whole assembly of the blade. It is good to note that this is where bacterial and food particles can accumulate.
A dishwasher can also assist you in running parts on top racks through a cycle. Make sure to use a mild detergent. After the cycle, remove all the parts immediately to prevent rust.
- Drying Parts Thoroughly
Before assembly, make sure all the blender parts are dry. This is important to ensure the parts are not affected by corrosion or rust. Also, wet parts can damage your blender and cause it to be unsafe for use.
A clean or dry cloth is needed to wipe the blender parts. Also, ensure the lid, jar, and base are dry.
- Blades Attachment
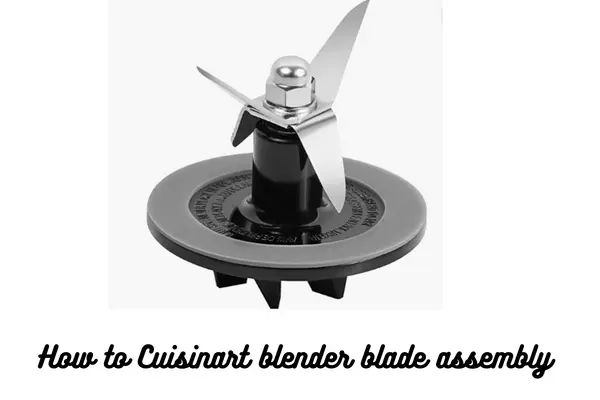
Attaching blades to the pitcher’s bottom is the next step you need to consider. There are several methods you can do it. However, this will mainly depend on the blender model you are using.
The first thing is to insert the blender blades into the pitcher. Then do the screwing on the bottom for easier insertion of blades. The next step is to insert the blades into the bottom and screw on the pitcher.
For the blender to spin properly, the blades should point away from the handle toward the spout. Also, ensure the blades are always pointing in the right direction.
- Placing Rubber Gasket On Blender Blade Assembly
The rubber gasket is important to create a tight seal. This should be between the blade or pitcher assembly. But you must ensure the gasket is properly placed before attaching the pitcher with the blade assembly.
- Press On the Button After Plug in the Blender
Before pressing the button, you need to plug the power cord into an outlet. Ensure the blender begins at a lower speed and increases to a higher speed. You can as well press the low button when you require using a low speed. The pulse button is available for any pulse.
- Insert the Pitcher
Here, you need to insert the pitcher gently into the blender. Never put more force into avoiding damage to the machine’s inner workings. After inserting the pitcher, make sure the lid is securely tightened. This step is important to ensure it is not loose to avoid problems.
- Adding Liquid
After making sure the pitcher is in place, ensure it is filled with water. Use a funnel to avoid spills. A piece of paper is useful when a funnel is not available. Here you require to pour your liquid slowly until the funnel is full. Remove the funnel and put the lid on when the pitcher is full.
- Add Ingredients
After assembly, now is the best time to add ingredients. Put all the desired items and blend until smooth. Lastly, enjoy!
There you have it! A complete guide on how you can assemble your Cuisinart blender. Please read it carefully and use it whenever necessary. Cheers!

