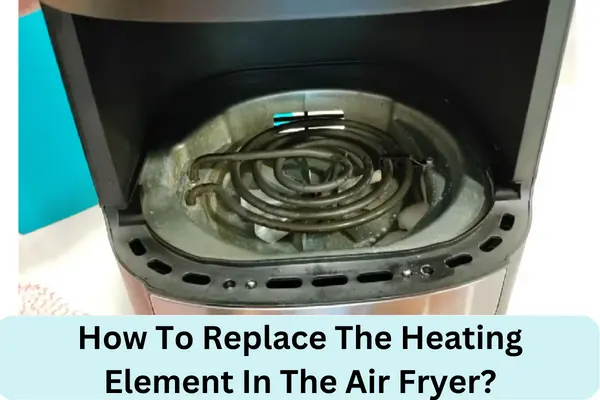
The air fryer will always stand out as the most versatile appliance in your kitchen. The reason is a bunch of cook settings that the oven comes with. You will likely replace your microwave, toaster, oven, and other appliances. But you won’t enjoy your air fryer treats when a defect creeps in. The heating element may fail, thus needing a replacement.
You don’t need to panic, as there are steps to replace the heating element in the air fryer. First, you will need a new component, then several replacement steps. Ensure you order from an authentic source to avoid counterfeits and more problems. There are air fryer dealers around you. Find out if they deal with heating elements and other air fryer accessories. If not, you can order from your brand’s manufacturer.
Steps;
- Identify the type of element that matches your air fryer. Without the right match, your air fryer will likely develop more issues. The brand name and specifications are some of the important details you won’t miss when buying a heating element for your air fryer.
2. Once your order, go through the user manuals to get the steps. Each appliance and components come with fixing instructions. Nevertheless, we are here to help you with the steps if you do not want to squint on those written fonts.
3. Locate the heating element on the roof of your air fryer’s cooking chamber. Again, this depends on the model. You must go back to the owner’s manual and determine the location. All this you do when your air fryer is fully unplugged from the power source.
4. Remove the air fryer basket and all the accessories, then overturn your air fryer. While overturned, it is easy to access the element.
5. Hold the top of the upper wall and remove your heating element.
6. Replace the defective heating element with a new one by fixing it in its slot.
The above steps to replacing the heating element in your air fryer are easy. But before determining if the components require a replacement, you must ascertain the damages. Here are things to check before replacing your air fryer heating element.
- Power Connectivity
Before concluding that your air fryer’s cooking element is faulty and needs replacement, check if there is power flow into the device. That can save you the pain of disassembling the unit and making unnecessary replacements.
If there is no power, even in the main meter box, wait for reconnection by the necessary personnel. Errors within your house could be due to a tripped socket. Get a tech to resolve this for you.
- Plug And Cable
A faulty plug or cable could be disconnecting your appliance from power flow. Check if there are any dents or breakages. The fuse could have blown and left your equipment without power. Replace the faulty plug and blown fuse to allow power into your gadget.
- Basket Placement
Is your air fryer basket sitting in an upright position? If it is tilted, most likely, the door won’t close well, and the sensor will not communicate with the oven to start heating. Remove the basket and place it well. Ensure the door latches properly for the cooker to start heating.
- Settings Configuration
Low-temperature settings and too short cooking time can make you believe that your air fryer is not heating—countercheck to ensure both are correct. Once you dial the right prompts, give the appliance time to heat and begin cooking. Take note of preheat setting in some air fryer models.
- Heating Element
After checking the time/temp settings, basket, door, and power connectivity, you may want to inspect the heating element. You can do it before cleaning the element. That gives you a chance to check for cracks. Also, the component may have slipped from its slot, so power is not flowing through. If the coil is intact, do an intensive cleaning and test your gadget.
- Dirt
A layer of dirt on your heating element will bar it from getting hot. You may need to clean the entire heating coil while ensuring that you do not break it. Usually, it is brittle and can break, causing more losses.
With a baking soda solution, you can clean your heating element. Mix it up with water and spray the solution when the unit is upside down. After 1 or 2 minutes, turn it over and with until the solution dissolves the stubborn grease.
Video
Related articles


