
Hard-boiling eggs in an air fryer? Sounds wild, right? But trust me, once you try it, you’ll never go back to boiling water. I used to dread waiting for the pot to heat up—only to end up with cracked eggs and that dreaded green ring around the yolk.
After some trial and error, I finally found the perfect air fryer eggs hard boiled time chart to get flawless, easy-peel eggs every time. In this guide, I will walk you through the best temps, times, and pro tips so you can master this hack like a pro. Let’s crack into it!
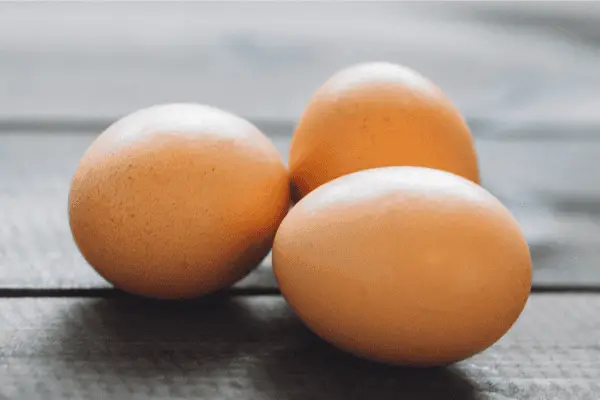
Air Fryer Hard-Boiled Eggs Time Chart

Timing is everything when it comes to hard-boiled eggs. Cook them too long, and you get that weird greenish-gray yolk. Too short, and you’ll end up with a gooey center when you were expecting a firm bite. That’s why I put together this air fryer eggs hard boiled time chart so you can get perfect results every time, no guesswork required!
Here’s a quick cheat sheet to match your ideal egg doneness with the right temperature and time:
Air Fryer Hard-Boiled Eggs Time & Temperature Chart
| Temperature | Time | Yolk Consistency |
| 200°F (93°C) | 17-18 min | Fully cooked but softer yolk |
| 250°F (120°C) | 14-15 min | Classic firm hard-boiled eggs |
| 275°F (135°C) | 12-13 min | Slightly firmer with a creamy center |
| 300°F (150°C) | 10-11 min | Firmer whites, drier yolk |
Pro Tip: Always transfer the eggs to an ice bath right after cooking. This stops the cooking process and makes peeling a breeze!
Does Air Fryer Model, Egg Size, or Altitude Matter?
Yep, they do! Some air fryers run hotter than others, so it might take a try or two to find your sweet spot. Egg size also plays a role—jumbo eggs need an extra minute or two, while smaller ones cook faster. And if you live at a high altitude, your eggs might take a little longer since air pressure affects how heat circulates.
I tested these times on a standard basket-style air fryer, but if yours cooks faster (or slower), tweak the time by a minute or two and take notes. Once you find the perfect settings for your air fryer, you’ll never have to wonder again!
Can You Boil an Egg in an Air Fryer Without Water?
Absolutely! It might sound strange at first after all, we’ve been told our whole lives that boiling eggs requires, well… boiling water. But air frying flips that idea on its head.
Instead of submerging eggs in water, the air fryer uses hot air circulation to cook them evenly, creating the same firm whites and creamy yolks you’d expect from a stovetop boil minus the hassle.
I remember the first time I tried this, I was skeptical. No water? No pot? Just eggs sitting in the basket? But once I pulled them out, dunked them in an ice bath, and peeled them effortlessly, I was sold. No cracked shells from aggressive boiling. No waiting around for water to heat up. Just pop them in, set the temp, and let the air fryer do its thing.
Best Temperatures for Hard-Boiled Eggs in an Air Fryer
When it comes to air frying hard-boiled eggs, temperature makes all the difference. Cook them too low, and they take forever. Too high, and you risk rubbery whites or chalky yolks. After plenty of test batches (and a few overcooked disasters), I found that 200°F, 250°F, and 300°F each have their pros and cons. Let’s break it down so you can choose the best one for your perfect egg!
Hard-Boiled Eggs at 200°F (93°C) – Slow & Gentle
Cooking eggs at 200°F is like a lazy Sunday morning slow and steady. The eggs cook gradually, which means less risk of cracking and a smoother texture. However, patience is key because it takes 17-18 minutes to get a fully cooked yolk. If you don’t mind waiting, this method is great for avoiding overcooked eggs.
Pros: Less chance of cracking, smooth yolk, no greenish-gray ring
Cons: Takes longer
Hard-Boiled Eggs at 250°F (121°C) – The Sweet Spot
This is the Goldilocks temperature—not too slow, not too fast. At 250°F, eggs take about 14-15 minutes, making it the perfect balance of efficiency and consistency. The whites stay firm but tender, and the yolk is fully set without drying out. This is the most recommended method because it works well across different air fryer brands.
Pros: Ideal texture, reliable results, moderate cooking time
Cons: Slight chance of cracking in some air fryers
Hard-Boiled Eggs at 300°F (149°C) – Fast but Risky
If you’re in a hurry, 300°F gets the job done in 10-11 minutes but it comes with a tradeoff. Higher heat means faster cooking, but it also increases the risk of rubbery whites and dry yolks.
Some air fryers may cook unevenly at this temp, leading to eggs that are slightly overdone in some spots. If you go this route, watch the timer closely and don’t skip the ice bath to stop the cooking process immediately.
Pros: Quickest method, great for meal prepping
Cons: Can overcook easily, higher risk of cracked shells
Step-by-Step Guide: How to Cook Air Fryer Hard-Boiled Eggs
Making hard-boiled eggs in an air fryer is ridiculously easy: no boiling water, no babysitting a pot, just set it and forget it. Whether you’re meal prepping for the week or just craving a quick protein-packed snack, this method delivers perfect results every time. Here’s a step-by-step guide to getting those flawless, easy-peel eggs!
Step 1: Preheat Your Air Fryer (If Needed)
Some air fryers require preheating, while others don’t. If yours does, set it to 250°F (121°C) and let it warm up for 2-3 minutes before adding the eggs.
Pro Tip: If your air fryer doesn’t go below 300°F, try reducing the cooking time slightly to avoid overcooking.
Step 2: Place Eggs in a Single Layer
Gently place the eggs directly into the air fryer basket or tray. Make sure they are not stacked—air needs to circulate evenly around them for consistent cooking.
No Egg Rack? No Problem! You can cook eggs directly in the basket, and they’ll turn out just fine. They might roll around a little, but that’s completely normal!
Step 3: Set Temperature & Time Based on Doneness
Now, it’s time to cook! Choose your preferred temperature and follow these time guidelines:
| Temperature | Cooking Time | Yolk Consistency |
| 200°F (93°C) | 17-18 min | Fully cooked but softer yolk |
| 250°F (121°C) | 14-15 min | Classic hard-boiled eggs |
| 275°F (135°C) | 12-13 min | Slightly firmer with a creamy center |
| 300°F (149°C) | 10-11 min | Firmer whites, drier yolk |
Want soft-boiled eggs? Reduce the cooking time by 2-3 minutes for a jammy center.
Step 4: Transfer to an Ice Bath Immediately
As soon as the eggs are done, carefully remove them (use tongs—they’re hot!) and place them in an ice water bath for at least 5 minutes. This stops the cooking process and prevents that dreaded greenish-gray yolk from overcooking.
Quick Tip: No ice? No problem! Just use very cold water and let the eggs sit a bit longer.
Step 5: Peel & Enjoy!
Once cooled, gently tap the eggs on a hard surface, roll them under your palm, and peel away. The shells should slide right off.
Easy-Peel Hack: Older eggs peel more easily than fresh ones. If you’re having trouble, gently crack the eggs before placing them in the ice bath—the cold water seeps in and helps loosen the shell.
And that’s it! Your air fryer hard-boiled eggs are ready to eat. Whether you’re slicing them into salads, making deviled eggs, or just sprinkling them with salt and pepper, this hands-free method is a total game-changer.
Air Fryer Hard-Boiled Eggs: Common Mistakes & How to Avoid Them
Even though making hard-boiled eggs in an air fryer is almost foolproof, little hiccups can still happen. Maybe your eggs crack open mid-cook, the yolks turn that weird greenish-gray color, or peeling them feels like a battle. Don’t worry I’ve been there, and I’ve figured out how to fix these common mistakes so you don’t have to!
1. Cracked Eggs – Why It Happens & How to Prevent It
Ever pulled an egg out of the air fryer only to find it split wide open? That’s because sudden heat expansion can cause eggs to crack. Unlike boiling, where water gently heats the shell, air frying exposes eggs to direct, high heat right away.
How to avoid it:
- Use room-temperature eggs – Cold eggs straight from the fridge are more likely to crack when exposed to high heat.
- Start with a lower temperature – If your air fryer runs hot, begin at 200°F (93°C) for the first few minutes, then increase the heat.
- Don’t overcrowd the basket – Eggs need space to cook evenly, so avoid stacking them.
2. Overcooked Eggs (Greenish-Gray Yolk) – Fixing the Timing
That unappetizing grayish-green ring around the yolk is a classic sign of overcooked eggs. It happens when eggs stay too hot for too long, causing a reaction between iron and sulfur in the yolk. While it’s safe to eat, it’s not the prettiest sight.
How to avoid it:
- Lower the temperature if needed – If your air fryer runs hot, try cooking at 250°F (120°C) instead of 300°F (150°C).
- Reduce the cooking time – Stick to 14-15 minutes at 250°F for classic hard-boiled eggs.
- Always use an ice bath – Immediately cooling eggs stops the cooking process and prevents overcooking.
3. Difficulty Peeling – How to Get That Shell Off Easily
Nothing is more frustrating than trying to peel an egg, only to have half the whites stick to the shell. Fresh eggs are notorious for this because their inner membrane clings tightly to the egg white.
How to make peeling easy:
- Use older eggs – Eggs that are a week old or more peel much easier than fresh ones.
- Crack them before the ice bath – Lightly tap the eggshell on the counter before dunking them in ice water. This helps water sneak in and loosen the membrane.
- Try the shaking method – Place cooled eggs in a container with a little water, shake gently, and watch the shells slip off effortlessly.